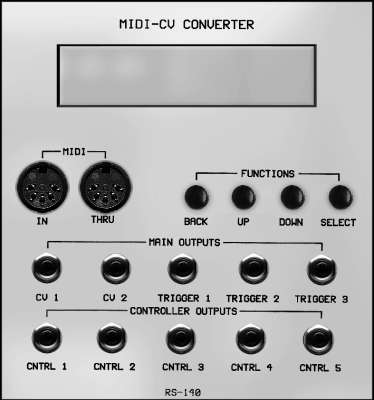
RS140
Midi / CV Converter
Upon its introduction in 1983, MIDI completely changed the way that we view and use synthesizers. It opened up music-making possibilities that were unthinkable a few years before, and made possible all manner of advanced sequencing and control facilities.
Its for these purposes the the RS140 was developed. Providing all the power of a powerful stand-alone MIDI to CV converter, it provides ten voltage outputs that allows you to control every aspect of modular analogue synth's sound generation. It is, therefore, a perfect complement to other monophonic synthesizers, as well as to the RS Integrators for which it was designed.
Unfortunately, there is a community of Luddites that clings to the idea that analogue is good, so digital must be bad. MIDI, being digital, falls into the 'bad' camp, and is (they believe) to be avoided. Don't fall into this trap (a) because it's a load of old hogwash, and (b) because MIDI will open up many possibilities for creative synthsis using your RS Integrator.
The RS140 is based upon a simple menu system displayed on its 2 line x 20 character LCD. The display i backlit to aid its use in darkened conditions.
Navigation
You navigate within a menu using the 'Up' and 'Down' buttons.
You select a sub-menu by pressing 'Select'.
You return to a previous menu by pressing 'Back'.
You select an option or parameter and return to the menu containing it by pressing 'Select'.
You leave an option or parameter unchanged and return to the menu containing it by pressing 'Back'
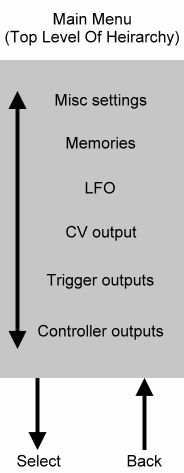
THE MAIN MENU
The main menu (the top level of the menu hierachy) offers six options that control every aspect of the RS140 operation. Press 'Select' with any of these options displayed, and the RS140 will take you to the appropriate sub-menu structure. There are, therefore, six sub-menus, as follows:
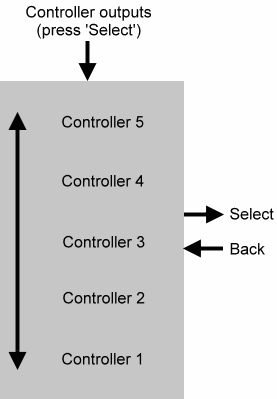 CONTROLLER MENU
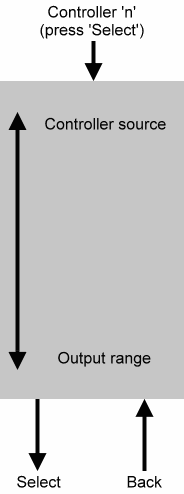
With large patches, you will require a number of independent controllers that control the aspects of the patch such as modulation depth, pulse, width, amplifier
gains...and so on. The RS140 offers five such Controller outputs - CNTRL1, CNTRL2, CNTRL3, CNTRL4 and CNTRL5 - with
independent sources and ranges for each.
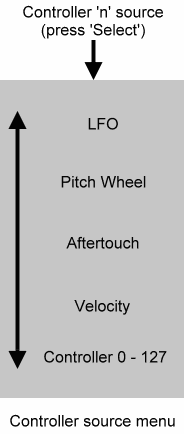
You select the Controller output to be edited using the controllers menu (above).
The Controller menu takes you to the Controller 'n' setup menu (where 'n' is a number between 1 and 5). This menu provides access to two further sub-menus that allow you to choose the MIDI Controller source and the range (in volts) of the CV Controller.
You can select from the 131 options for each controller source. (There are 132 options for CNTRL1 - see below). These are the 128 MIDI CCs, plus velocity, aftertouch, the pitch wheel, and (on Controller 1 only) the RS140's internal LFO.
If you choose a MIDI CC, the RS140 will tell you its normal use. This helps avoid confusion when you use numerous MIDI controller within a larger set-up.
Hint:
Use a number of controllers within a patch to add expression to your performances, either by using the keyboard parameters such as aftertouch, or by using the MIDI to modify the patch dynamically.
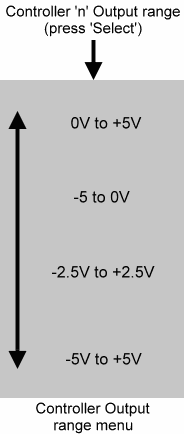
There are four voltage options for each of the five Controller Outputs. Select the range that is appropriate for the input to which you are directing the Controller Output.
Note:
The discrete voltages determined by a dynamic MIDI input pass though a slew generator before being output. This smooths the transitions between the quantised voltages, and reduces the 'zipper noise' that might otherwise occur. To permit control by all the internal LFO waveforms, Controller 1 is less filtered that Controllers 2,3,4 and 5, and therefore may exhibit a certain amount of
quantisation.
 TRIGGERS
The RS140 provides three Trigger outputs that you can configure as the conventional Triggers, S-Triggers, and gates. This means that you can use the RS140 with 1V/Oct synthesis such as the
minimoog.
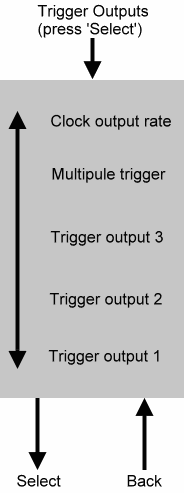
For each of the three Trigger outputs, you may independently
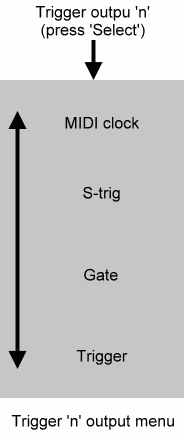
select the output type. The options are trigger, gate, and S-Trig.
A fourth option - MIDI Clock - allows you to generate a stream of clock pulses related to MIDI clock data in the input signal. The rate of these pulses is determined by the 'Clock output rate' menu (right).
Note:
Many keyboards and sequencers do not generate MIDI Clock, so it is quite possible that you will obtain no output when this option is
selected.
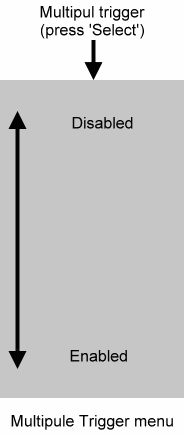
You may select multi-triggering. (Note: this setting affects all three trigger outputs simultaneously.)
If you select multi-triggering, an output will be generated every time a MIDI NOTE ON is
received. If multi-triggering is disabled, a signal will only be generated when no previous notes are still held.
If MIDI Clock is present in the input signal, can generate a stream of pulses at the Trigger outputs.
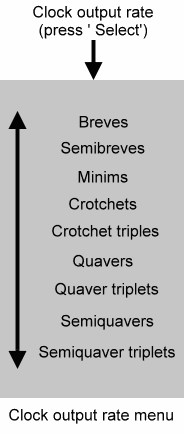
For any given MIDI Clock input rate, you may select from the nine options in this menu to determine the output clock rate.
Use this facility to synchronise changes in your patch - or to drive Sequential Controllers such as the rs200 - in synchronisation with your MIDI equipment.
Note:
Semiquaver triplets are the fastest, while breves are the slowest.
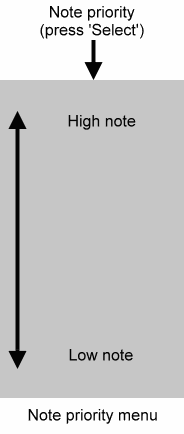
Early monosynths such as Moogs and ARP's used low-note priority to determine which note played at any given time. Later instruments such as Yamaha's and most Korgs and Rolands used high-note priority.
This menu allows you to tailor the RS140's response to your preferred playing style.
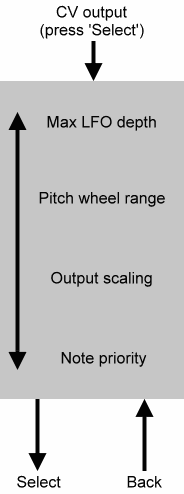
 CV OUTPUT SETTINGS
The following four sub-menus allow you to determine how the RS140 will respond to incoming note
data.
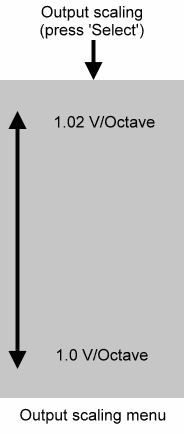
Although most vintage analogue synths respond to a 1V/Oct pitch relationship, acoustic keyboards are tuned to a
'stretched' scale that sharpens notes very slightly as you play up the keyboard.
To provide this tuning, you can select the option 1.02V/Octave. With this selected, the RS140 will increase the output (Pith CV) voltage by 1.02V rather than 1V when you play an octave higher on your MIDI keyboard or sequencer. This, in turn, ensures that the
Integrators oscillators are stretched in the appropriate fashion.
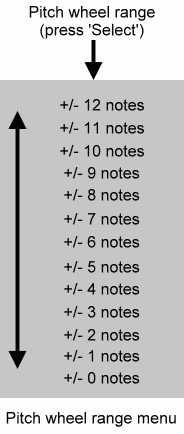
Use this menu to select the amount of pitchbend applied when you move the MIDI
instruments pitchbend wheel between to its further extremes.
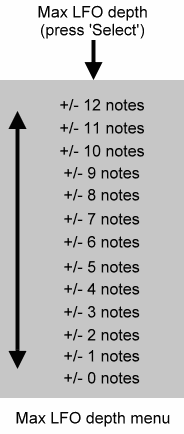
This determines the maximum pitch variation provided by the internal LFO when (i) the LFO amplitude is set to 127, and (ii) the CV is output to a 1V/Oct input.
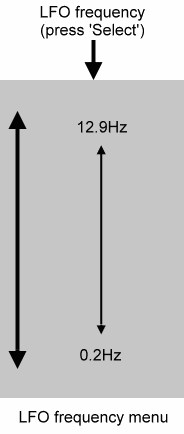
You can determine the LFO frequency in 0.1Hz steps across the range from 0.2Hz to 12.9Hz
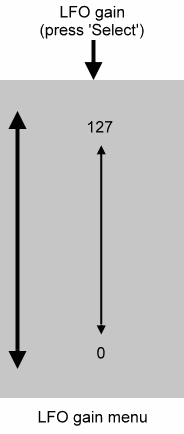
You may set the maximum gain of the LFO manually in the range 0 (no LFO output) to 127 (maximum).
You may also use a MIDI controller or CC to control the maximum gain. If you choose a MIDI CC, you must use the 'LFO gain controller' menu to determine which MIDI controller is used.
INTERNAL LFO
The RS140 offers a fully featured internal LFO with multiple waveforms, MIDI sync, and MIDI-controlled gain.
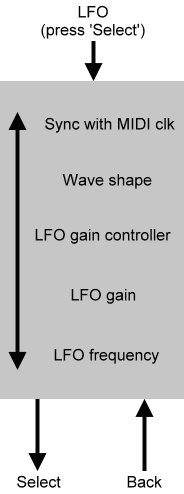
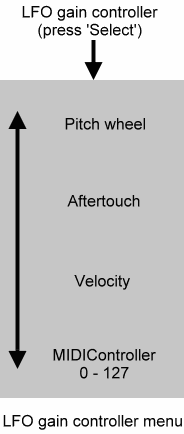
If you select 'use MIDI controller' in the LFO gain menu, you must use this menu to determine which MIDI controller or CC is used.
You can select from 131 options: the 128 MIDI CCs, plus velocity, aftertouch, and the pitch wheel.
If you choose a MIDI CC, the RS140 will tell you its normal use. This helps avoid
confusion when you use numerous MIDI controllers within a larger set-up.
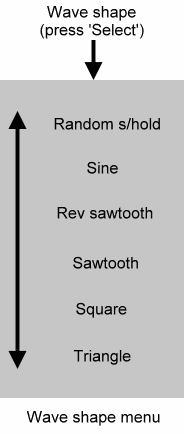
You may choose between six LFO waveshapes.
The sample and Hold waveform has a maximum amplitude equal to the maximum gain of the cyclic waveforms, and is re-sampled once per cycle.
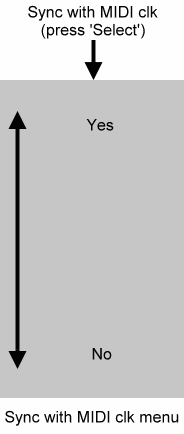
Provided that the MIDI clock is included within the incoming MIDI data stream, you can synchronise the LFO to this.
With the Sync to MIDI Clk option set to 'Yes' the LFO waveform will be reinitialised every time a reset pulse is
received.
For any given MIDI tempo, the rate at which pulses are received by the LFO is determined by the Clock Output Rate menu in the Trigger menus.
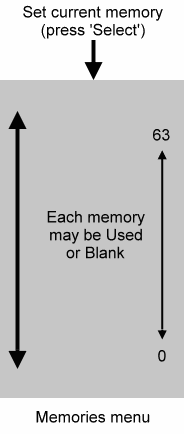
Use this menu to select the memory that contains the configuration you wish to use.
You can, of course, freely edit a memory, and any changes will be stored automatically (i.e. you do not need to perform a 'save') in the user area (memory 0).
These changes will be retained when you switch off the RS140.
If you wish to store the user area in memory, you must use the 'write to memory menu'.
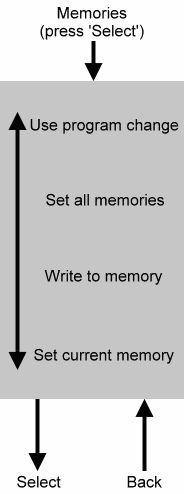
MEMORIES
The RS140 provides 64 user memories. These make it quick and easy to recall specialised set-ups for specific patches.
You may store the current user area configuration in any of the 64 memories.
The RS140 will tell you whether a selected memory is used or blank, helping you to avoid over-writing existing configurations that you may wish to keep.
However, if you press 'select' the memory will be written whether it was previously blank or not.

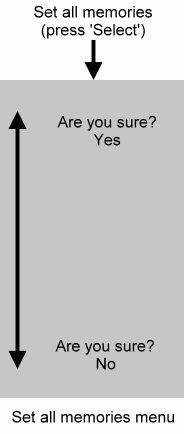
Use this memory to set all memories to the current configuration.
WARNING: This operation can not be undone, so proceed with care.
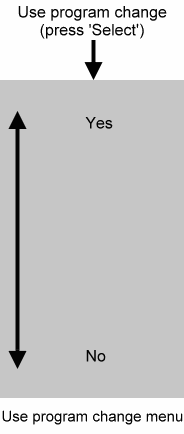
When the option is set to 'Yes', the RS140 will receive
MIDI Program Changes on the MIDI channel set in the Channel sub-menu in the miscellaneous menus.
Program changes in the range 0 to 63 are received and acted upon. Changes outside this range are ignored.
When the RS140 receives a valid program change, it copies the contents of the appropriate memory to the user area. In other words, on receiving program change #n, it copies the contents of memory #n to Memory #0.
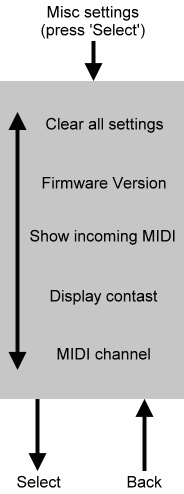 MISCELLANEOUS
The following five sub-menus contain the remaining options that do not belong in the other menus. Use these to set up and troubleshoot your RS140.
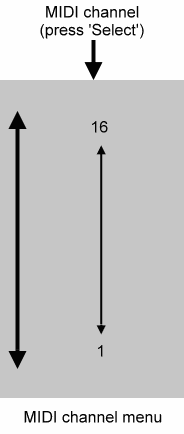
This menu selects the MIDI channel to which the RS140 will respond.
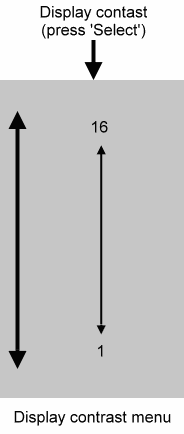
You should use this to adjust the contrast of the LCD for maximum clarity.
The RS140 will act as a MIDI monitor. This will allow you to investigate the data within the incoming MIDI stream, and is an invaluable aid in troubleshooting a large MIDI system.

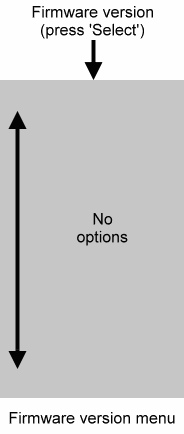
You may display the firmware version of your RS140. Please check this and note it down somewhere so that, if you have problems that require technical support, you can tell us which version you have.
The version will be of the form:
RS140 Vx.x Iss.x.x
...where 'x' is a digit between zero and nine.
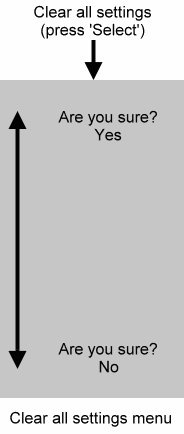
You can use this menu to erase all memories and the user area, returning the RS140 to its default values.
WARNING
:This operation can not be undone, so proceed with care.
PORTAMENTO
The pitch CV produced by CV1 and CV2 will respond to MIDI Portamento commands as follows:
Portamento On/Off
The RS140 responds to MIDI CC#65 - Portamento On/Off. Values in the range 0 to 127 are accepted. For
received values in the range 0 to 63, portamento is off. For received values in the range 64 to 127, portamento is On.
Portamento Rate
The RS140 responds to MIDI CC#5 - Portamento Time MSB. Values in the range 0 (off) to 127 are accepted. MIDI CC#37 (Portamento Time LSB) is ignored.
INPUTS AND OUTPUTS
The RS140 offers twelve connections sockets, of which two carry MIDI signals, and ten carry analogue signals.
MIDI Connections
MIDI IN
Connect the output (MIDI OUT) from another MIDI device to the MIDI IN of the RS140.
MIDI THRU
Any MIDI data received at the MIDI IN of the RS140 will be echoed (transmitted) by the MIDI THRU socket. This allows you to use the RS140 within a daisy chain of MIDI devices.
Note: The RS140 generates no MIDI data of its own.
Analogue Connections
All analogue connections are outputs, as follows:
CV1, CV2
These outputs carry pitch CVs derived from MIDI note data. The RS 140 responds to the standard MIDI note range, with an output of 0V produced by MIDI note #24.
Trigger1, Trigger2, Trigger3
These outputs carry Triggers derived from the MIDI data.
CNTRL1, CNTRL2, CNTRL3, CNTRL4, CNTRL5
These outputs carry up to CVs that the RS140 derives from MIDI controller data.
MIDI DETECT LED
The red LED on the RS140s front panel will flash when a MIDI signal is detected on the selected channel.